on
Blog setup: Domain Name
In my first post I wrote, that the first series of posts will be about the setup of my blog. As I am always curios how things work and what needs to be done to combine all the different pieces, I decided to host my blog in my apartment. Currently, it is running on a linux server, but the ultimate goal is to migrate the blog, to a Raspberry Pi based Kubernetes cluster that I have already running. But as this is further down the road, I will focus for now on the current setup.
First let me show you a high-level overview, how a call from your browser
ends up at the server, that is hosting the blog. I simplified especially the
part at your end and the involved components within the internet, as this
would add additional complexity, which is out of the scope for this post.
Nevertheless, it should give you a basic understanding of what is going on.
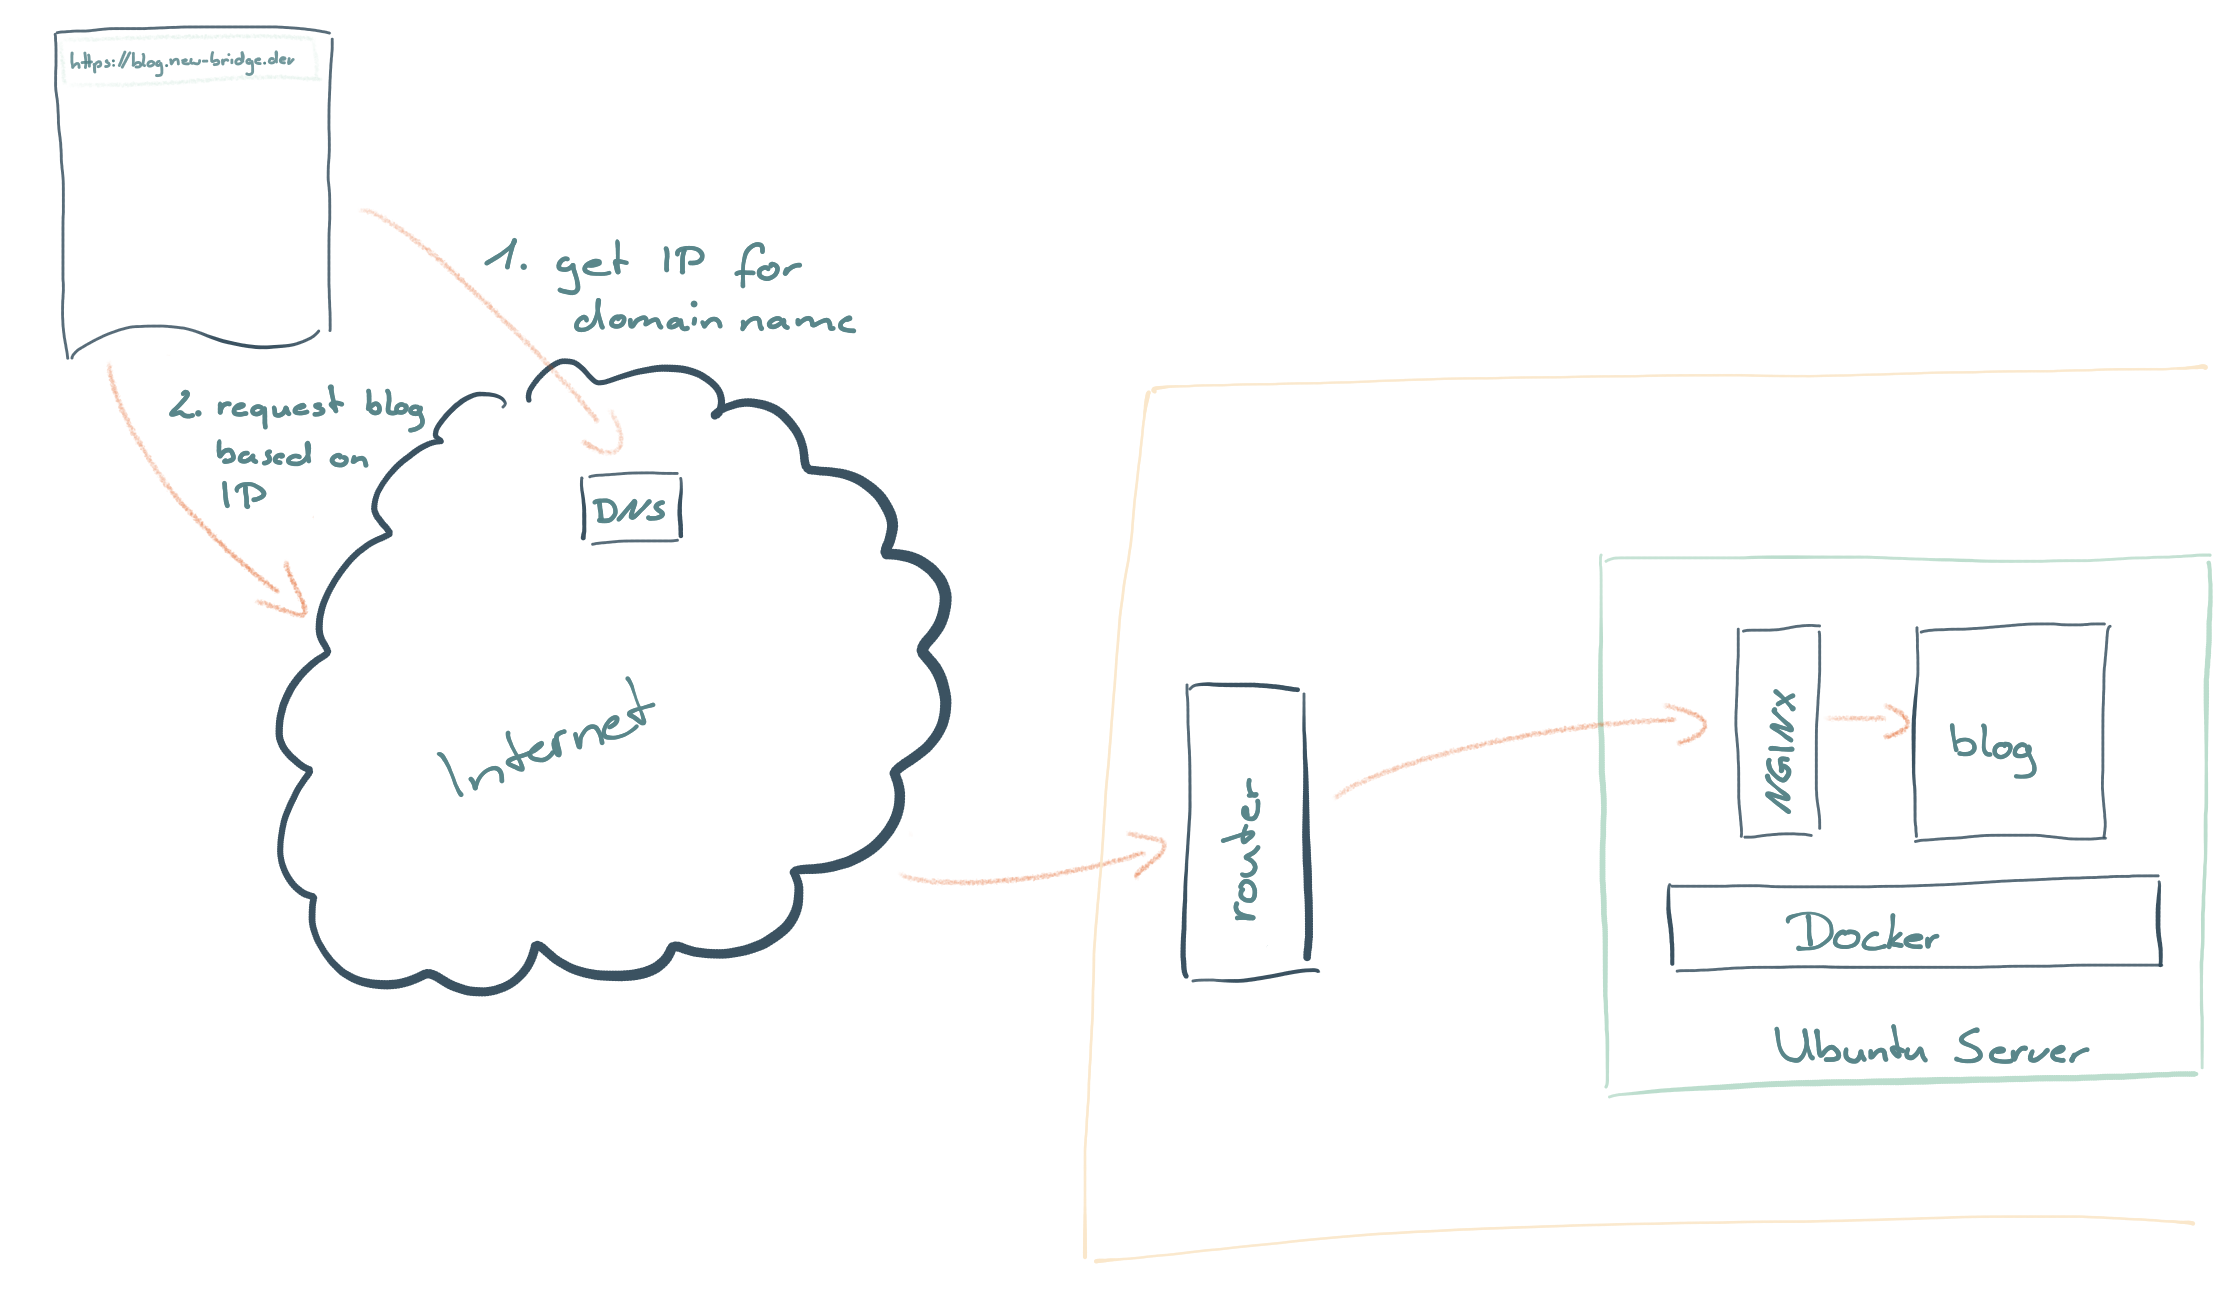 High-level overview of how to access my blog
Domain Name
Let’s get started by talking about domain names. You ended up on my block by either clicking on a link or by entering the URL https://blog.new-bridge.dev into your browser. Each URL consists of three parts:
- the protocol (e.g. https)
- the domain name (e.g. blog.new-bridge.dev)
- the file to display (e.g. index.html)1
For this post, I will focus on the domain name, but we will come back to the protocol in one of the next posts, especially when talking about how to handle the request within the network of my apartment.
The domain name, among other things, identifies a resource on the internet and is the central piece in the URL. In order to get your own domain name you have to sign-up with a domain name registrar, which allows you to register domain names. Most of the registrars also have additional services like web hosting, mail hosting and so on, so that you don’t need to set up and configure the infrastructure on your own. After some research, I decided to register the new-bridge.dev2 domain name at Namecheap.
Now that I had registered a domain name, I needed to make sure, that the requests for that domain are routed to the router in my apartment.
DNS
Traffic on the internet is not routed based on domain names, but instead based on IP addresses. This means, you can also access my blog via 213.55.173.239, which is the IP address that is assigned by my ISP (Internet Service Provider) to my router3. In order to make sure, that all the requests for blog.new-bridge.dev are routed to this IP address, I had to configure the DNS (Domain Name System), using the tooling provided by the registrar. To do so, I added two lines to the configuration to do the job.4
First I added an A record, that forwards all the requests for the current domain to the IP address: 213.55.173.239 (@ is a placeholder for the current domain, which in my case will be replaced with new-bridge.dev)
@ IN A 213.55.173.239 ;In addition to the first record, I added a CNAME record, that forwards all the requests for blog.new-bridge.dev to new-bridge.dev
blog IN CNAME new-bridge.dev. ;After these changes were activated5, each request to my domain (independent of the protocol), started being forwarded to my router. The next step, was to configure the router, so that all the requests are forwarded to the linux server. But I will tell you more about this in the next post.
Thanks for reading!
-
There is no file shown in the example URL. It would be placed after the domain name and separated by a
/↩ -
I picked this domain name as an homage to the place where I grew up
 ↩
↩ -
If you also want to host a blog in your apartment, you either have to make sure, that your ISP assigns you a fixed IP or that you use a Dynamic DNS ↩
-
I could have also configured the DNS with one entry, but as I have also other things configured, this was the better choice for me ↩
-
Changes to the DNS aren’t instant and it will usually take several minutes or in worst cases up to 24h until they are propagated throughout the internet ↩